This post is part of a series.
Part 1 – The basics
Part 2 – Lifecycle Management and Provisioning/Deprovisioning
Part 3 – RBAC/ABAC, Entitlements Management, and Requests & Approvals (this post)
Part 4 – Separation of Duties, Certification / Attestation, and Privileged Access Management
Update September 2022 – Microsoft released a new service called Lifecycle Workflows that helps with the automation of tasks based on the Joiner-Mover-Leaver cycle. I will write a separate post on this topic soon.
RBAC / ABAC
You may ask, how does this all relate to the access controls models we’ve heard about? Well, I could present a full dissertation on ABAC, RBAC, MAC, and DAC, but I’m just going to mention the difference and that the JML process is closely related to these terms because these are the most common access control policy models.
- DAC – Discretionary Access Controls
- MAC – Mandatory Access Controls
- RBAC – Role Based Access Controls
- ABAC – Attribute Based Access Controls
DAC is based on ACLs or a matrix of rules, such as OS permissions. MAC is mostly used for government, as its based on security labels or clearance levels. RBAC is probably the one most people are familiar with, since it’s essentially the foundation of ABAC, you can consider RBAC the ‘birthright’ or ‘default’ role privileges, based on job responsibilities, as I mentioned on the previous post. And ABAC, as the name implies, is based on attributes and/or combination of attributes, and for that reason is the most granular. It is also the most flexible, and quite common for more modern SaaS services, including most cloud resource services.
In the ABAC example below, I created custom security attributes (currently in preview). In my example I am using clearance levels of ‘Confidential’, ‘Secret’, and ‘Top Secret (TS)’, and I’ve assigned a different level to three different users.

So, when I go to assign the Storage Blob Data Reader role, I can assign it to a group that includes all three users, as members of the ‘My Super Secret Project’ group:
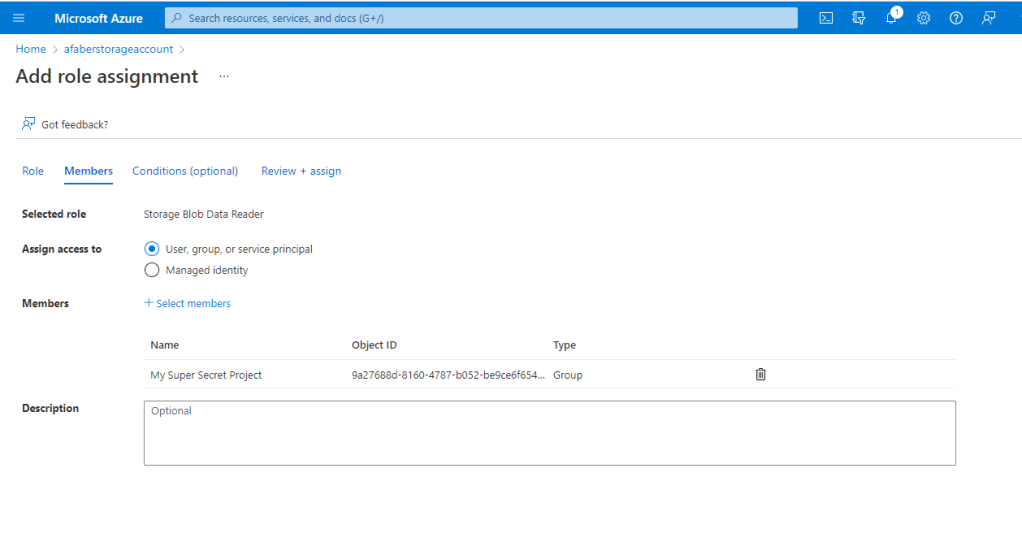
But I can add a condition that only allows them to read, if they have SecurityClearanceLevel attribute value of ‘Top Secret (TS)’.

As you can see it can get very granular. That’s why the approach is typically to start with RBAC, which includes the bare minimum privileges a specific role will need, and then expand to ABAC, to be able to control granular access privileges.
Entitlements Management
So, to start with RBAC enterprise teams typically work with the identity management operations team to create specific access packages for the various roles within their team. These packages are just groups of privileges that may include membership to security groups, target application roles, even access to sites where files are stored. These packages exist within catalogs that end users can then request from based on certain criteria. However, some packages will be deemed “birthright” for a specific position and/or department combination, so those packages can be automatically assigned to those end-users. The triggering of the automatic assignment may be based on values or combination of values on the user record, such as department, job position, etc. The automation of the assignment and removal of these privileges can be achieved using existing tools, such as Logic Apps that communicate with the Microsoft Graph API to trigger assignment of access packages.
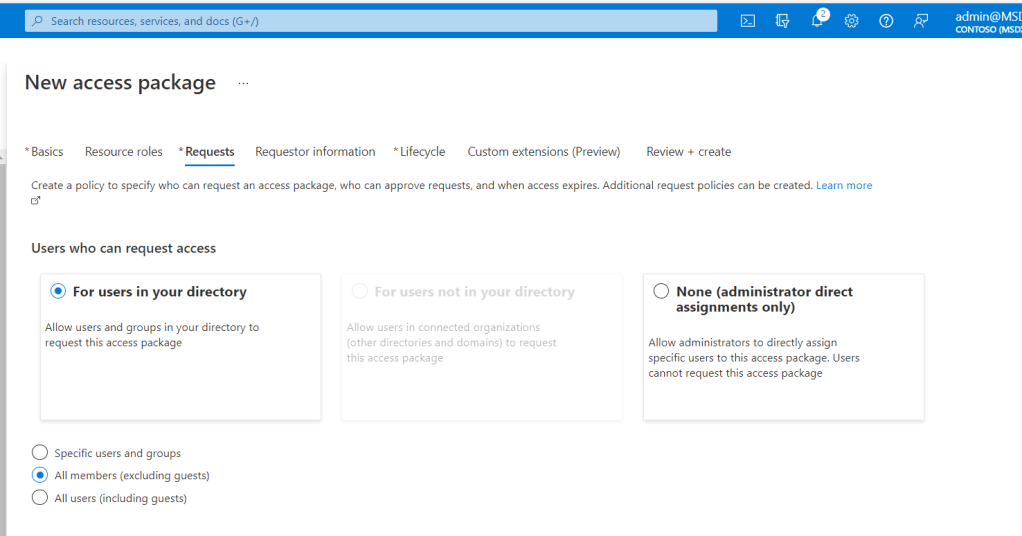
In the example below, I am making the access package available to be requested by “all members (excluding guests)”, that way I can isolate specific set of permissions from my guests and maybe I can create a separate access package that is just for guests, with those permissions that the enterprise has deemed appropriate for guests.
Notice above the “For users not in your directory” is greyed out, this is because this access package is created within a catalog that is not enabled for external users, as you can see below. This is a flag that can be controlled and can be very useful to isolate permissions.

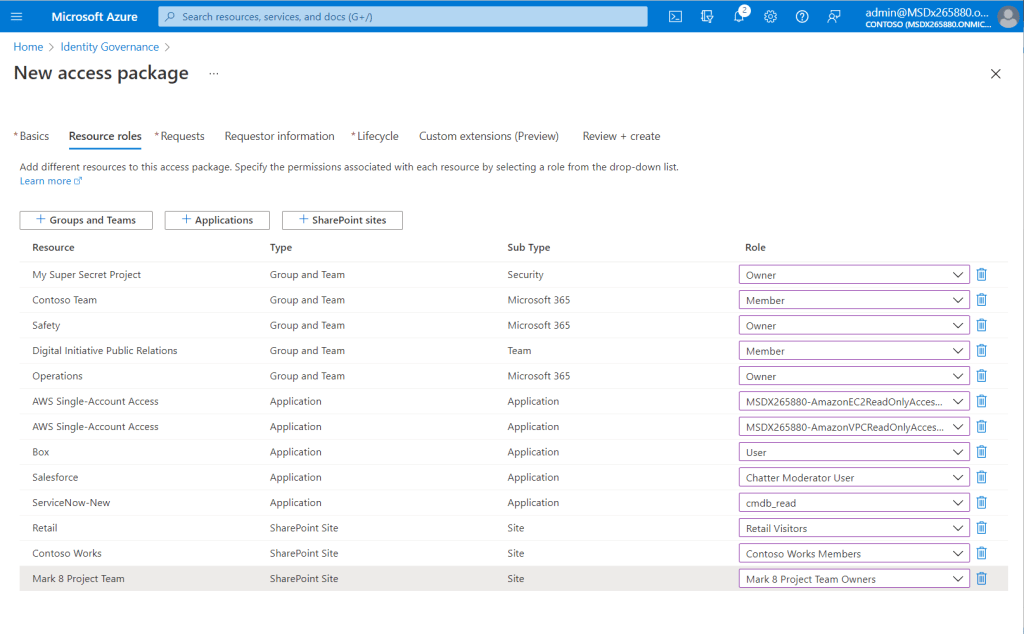
In the example below I am creating an access package that will include all the access that any person joining a specific team will require on day 1. One thing to notice here is that I have the ability to include more than just security groups. I am able to include security groups, teams, SharePoint sites, and application roles, which is a huge Azure AD benefit that is not possible with other identity providers, as I discussed in detail in my previous post, Groups vs Roles.
I can also add specific questions to be answered during the request, data that may be required for auditing and compliance purposes:
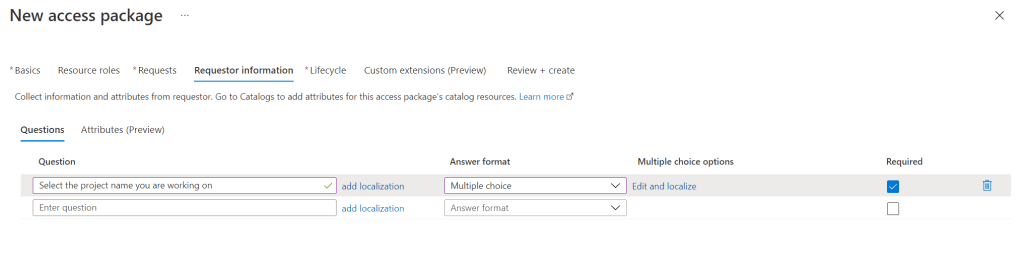
Another fantastic feature is the ability to collect data that is required for specific resources. In the example below, the ServiceNow resource requires an additional attribute maybe because provisioning has been configured to populate that value on the target application or maybe I need it to trigger additional logic apps, so I am able to add that attribute to be included during the request process, as shown below:

The ability to enforce least privilege goes hand in hand with the ability to remove access when no longer needed. Normally, the minimum any identity provider should provide is access reviews, which I cover on part 4. However, Azure AD goes above and beyond by providing the ability to expire access packages. I’ve seen this be a hard to meet requirement for some compliance frameworks, especially those related to government compliance requirements.

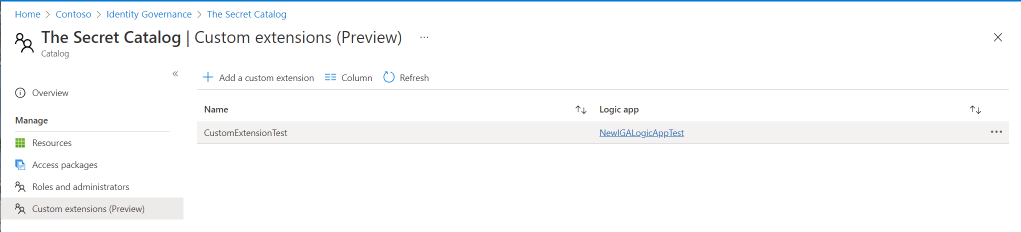
Finally, one of the newest features that is currently in preview is the ability to trigger other actions during a specific stage of the access package.

This is the ultimate flexibility because these custom extensions are used to trigger custom Logic Apps, which many Azure developers are already familiar with. This is something where Microsoft partners can build on top of the Azure AD solutions to enhance the JML process for enterprise customers.
One important note here. As I mentioned in part 2 of this series, it is highly recommended to use solutions that support the SCIM protocol for provisioning/deprovisioning. Logic apps are great for additional changes that may be required on target applications, additional flags that need to be set, etc., but the actual provisioning/deprovisioning of the users and their access should use SCIM where possible. I’ve seen other identity providers use tools to provision that do not rely on the SCIM protocol and it has been the source of many headaches.
Access Requests and Approvals
Other packages, such as those that include administrative privileges, may have to be requested and approved by various levels. Keep in mind that the same package that may be deemed “birthright” for a member of the security team may be a package that requires approvals for members of a different engineering team. Azure AD provides the ability to create different policies for different requirements:

The benefit in creating access packages is that they are typically associated with a specific role, and so the owners of those roles can determine the level of access required in every single application, which can then be assigned or requested by members of teams, without having to request dozens, sometimes hundreds of different permissions.
As noted above, within each policy, not only can I designate which users or groups can request the specific access packages, but I can also designate who will approve the access for each of the levels and if there is a backup action to be taken, in case someone doesn’t approve/deny the request within a specific amount of time.

And don’t forget about connected organizations, which allows the ability of controlling specific access to my tenant from specific external tenants.

With connected organizations I can designate some access packages to only be requested by a specific external tenant, and I can also set an expiration on those! So, if the access expires then the guests can be removed automatically from my tenant, when they no longer require the access.
In the final part of the series, part 4, I cover the final identity governance requirements an enterprise should expect from their identity solution.

2 thoughts on “Joiners – Movers – Leavers (JML) Part 3”