TL;DR – How to create a custom logic app connector, so you can store your API key securely and use it within your playbooks, when there is no pre-built connector.
I’ve had this discussion with at least three different partners recently, so I am publishing this blog to share with anyone else that may have the same question, since it seems to be a popular one recently.
As you know Logic Apps are used for automation within various Microsoft security services, including Sentinel (playbooks), Defender for Cloud (workflow automation), and others. Most of the time there is an existing connector, but sometimes SOC teams need to connect to custom developed APIs, and that’s where this scenario comes in. In those cases, we still need to store those API keys in a secure manner. That’s especially the case if you are managing playbooks within your customer’s workspaces (MSSP architecture) and you need to ensure any connection information is stored in a secure manner.
Create the custom connector
Note: “Custom connectors are RESTful APIs that can be hosted anywhere, as long as a well-documented Swagger is available and conforms to OpenAPI standards. A custom connector can also be created for a SOAP API using the WSDL that describes the SOAP service.“
To create the custom connector, go to the Azure portal and search for “Logic apps custom connector“.

You will just need to enter the default information, name, region, resource group, etc.
Note: Make sure your new Logic App Custom Connector exists in the same region your playbooks exist, otherwise you won’t be able to find it.
Once that’s done you will need to ‘Edit‘ your connector to specify the import mode, where you can use an OpenAPI definition, or a Postman collection, as shown below. You can also modify the icon for your connector. The host and base URL will be filled in automatically based on your imported info.

Here is where we’ll choose the authentication type, which in my case is an API key.

And then I can select the various Actions and Triggers I will need for my connector, as shown below.

For additional information and options in this section, please reference the Logic Apps documentation.
Using the connector within a playbook
Now that I have a connector and at least one action, I can create a new Logic App where I can connect to my custom API. I’ll find it under the ‘Custom‘ tab when choosing an operation, as shown below.

Once I select the action, I’ll be presented with the menu to enter my new connection name and the API key, as show below.
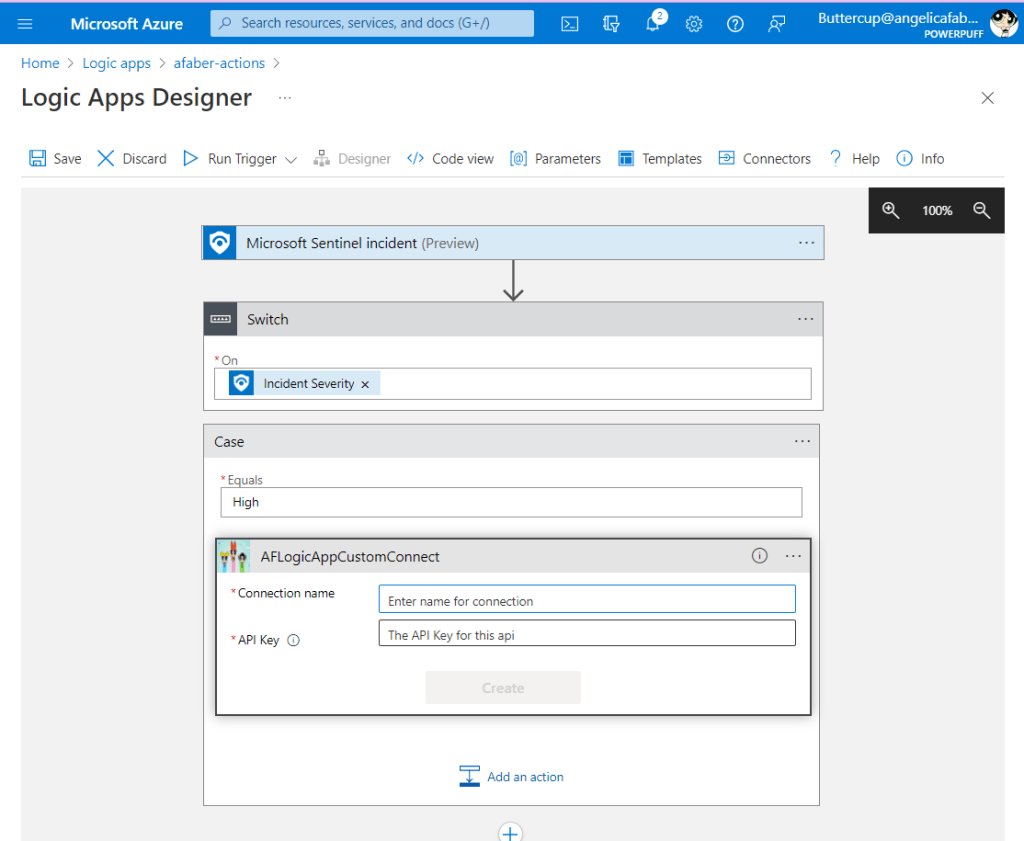
Once I save my creatively named connection, ConnectABC, my API key will be stored securely.

I can also configure any additional parameters that I need for the connection, as shown below.
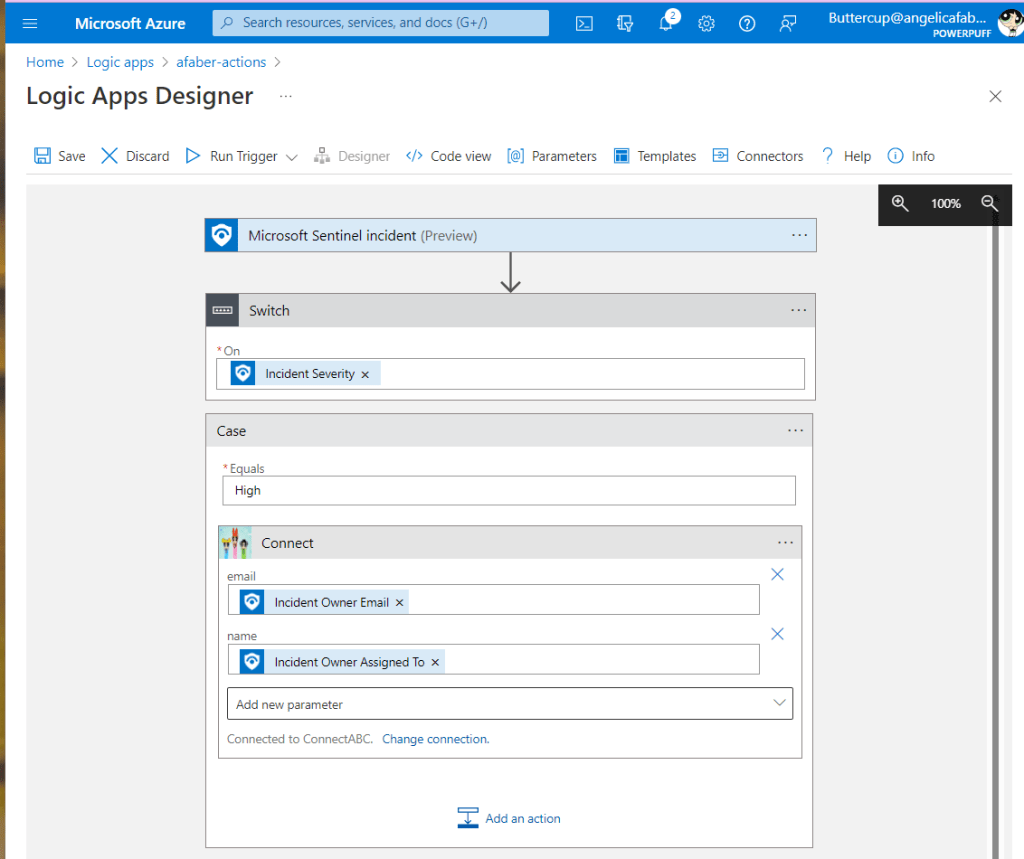
The connection I created is now stored under the ‘API connections‘ blade within my logic app menu, as shown below.

And it’s not a value that I can see, which is why it’s secure! However, I can update it if I need to do so later on, as shown below:

I am still learning about Logic Apps and the incredible flexibility they offer as part of our SOAR features within the Microsoft security services. I hope you find this information useful and continue to explore with me!
