TL;DR – My initial adventures with Copilot Studio. Part 2 is on AI Plugins, specifically, a very simple Security prompt I created.
When I initially started playing with Copilot Studio (previously PVA), my curiosity was triggered by the creation of plugins. So far, I’ve only created one type of plugin, but as soon as I get some time, I’ll be testing the other types as well. This is part 2 of a short blog post series on Copilot Studio.
- Part 1 is about Topics, specifically, a very simple Security Topic I created.
- Part 2 (this blog) is on AI Plugins, specifically, a very simple Security prompt I created.
There are a few types of AI plugins available, you can reference the documentation to go over the options. This feature is still in preview and during the preview, you can only use these plugins with Microsoft Copilot, you can’t use them with custom copilots, like the one I referenced in part 1. Again, I am looking towards the future and trying to learn about the possibilities that may become available, so please keep that mind as I go through this first plugin. As I mentioned above, I do plan to test additional plugin types in the future.
Licensing
The feature I am sharing here is only available if you have AI Builder credits. The least expensive option I found to get some of those credits is through the Power Apps Premium license. Maybe there’s another way, but that’s the one I found. It comes with 500 AI builder credits, which can do a lot more than what I am doing here (for now). Also, once you have the license, you have to assign the credits to your environment and you do that via the Power Platform admin center. For more details, please review the documentation.
Security Prompt
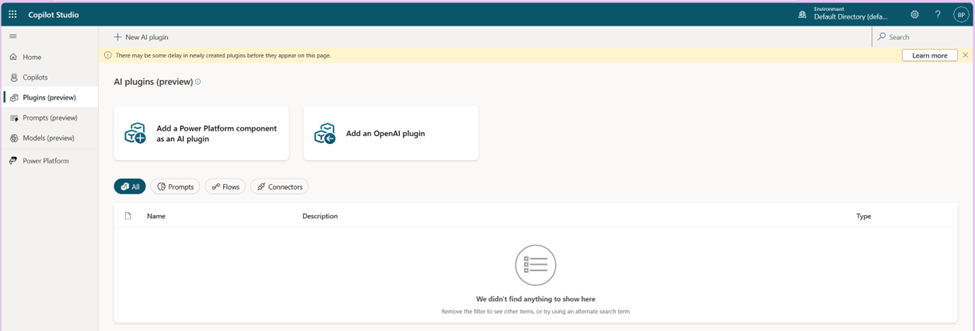
Within the Copilot Studio menu, there are two ways to get to the menu to create these prompts. You can either reach it via the Plugins (preview) menu or via the Prompts (preview) menu.
From the Plugins menu, you will see these options:
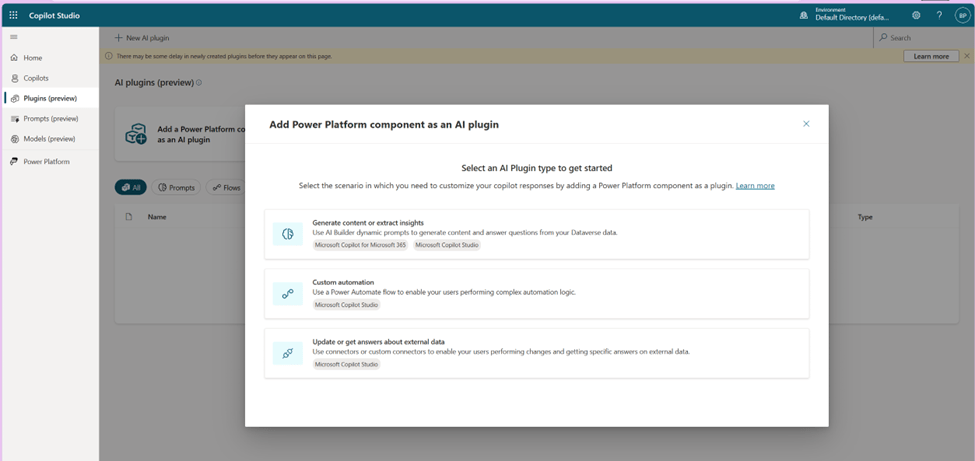
The first one is the prompt option, Generate content or extract insights. You then get to name your prompt and enter the prompt contents and then test it out. Of course, you do need at least one dynamic value and you can name that whatever makes sense to the end user. This is where the value of reusing those successful prompts becomes very valuable. Then all the end user has to do is pass the value for the variable.

Then you get to test your prompt with a sample value (or values). In my case the prompt is “What steps should I take to perform a Proof Of Concept for a Microsoft Security service, specifically, for <<<Microsoft Security Service>>> ? Please ensure you list any licenses or subscription fees that may be associated with the service. Please ensure you list any permissions required to configure the service. Also, please list at least 10 features that should be tested during the POC.” And I am testing it with the value of “Sentinel“.
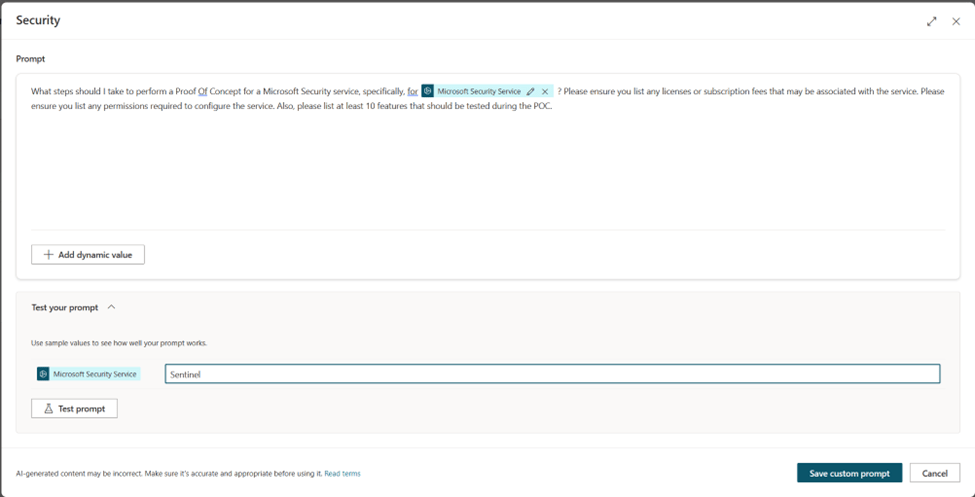
I can modify the prompt as needed based on the expected results. This is where I would play around with maybe formatting, if that’s something that is important to me. In this case it’s just a test, so I am leaving it as is and here is the test result.
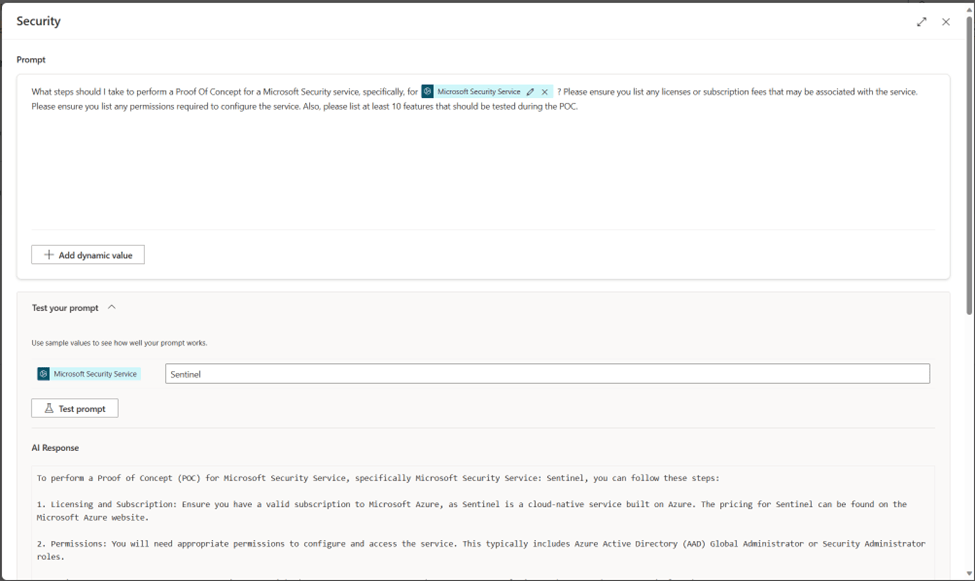
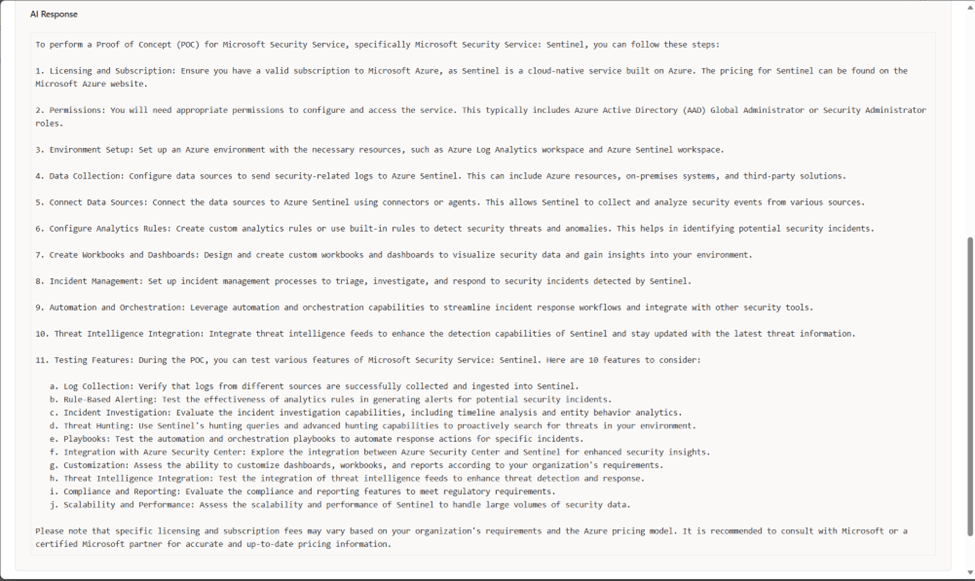
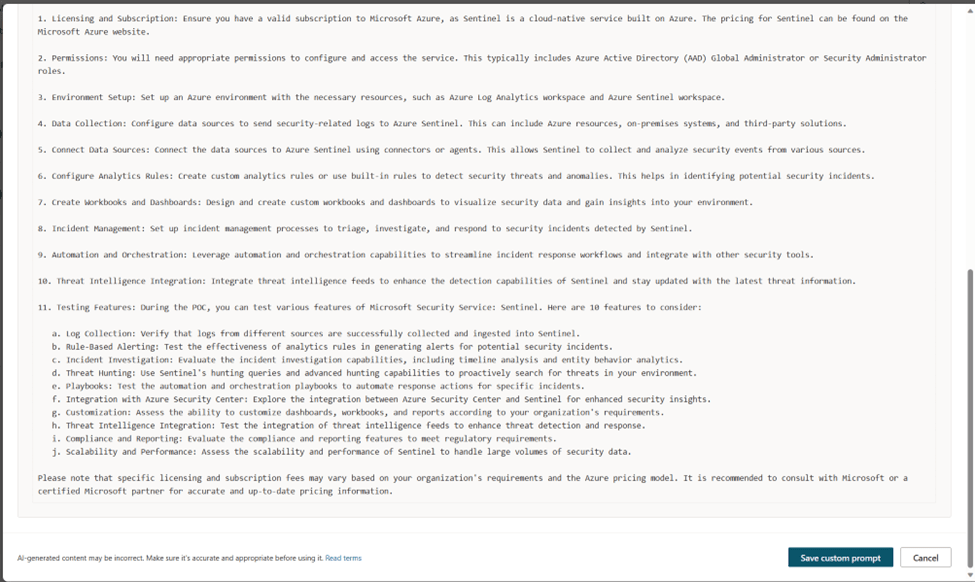
Once I am happy with the results, then I can save that custom prompt, which will then show under my list of prompts.
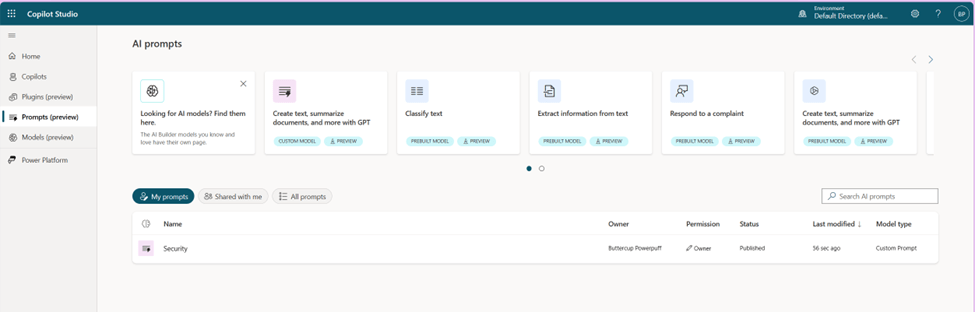
And eventually under the plugins as well. Although there is some delay with this blade currently.
If you are using this plugin with Microsoft Copilot, you do need to enable it in Microsoft Copilot.
Learning
I am still learning about the possibilities with this new tool and I can only imagine how much more powerful it will become in the future. So far, it’s been very straight forward to follow along the steps to test it out. If you are curious, like me, go ahead and give it a try. Enjoy!

One thought on “Playing with Copilot Studio – Part 2”